
By: Ron Miller | Published: April 30, 2025
Easiest ClickHouse Deployment Ever (with Fly.io)
ClickHouse is a rising star database for time-series use cases. It has amazing performance and rich OLAP analytics capabilities that are perfect for storing application telemetry (logs, traces, metrics) and business events. CH has blazing-fast columnar storage, ideal for time series. It has built-in compression that uses little storage and it's massively parallel and can process billions of rows per second per core.
ClickHouse is designed to be a distributed database. It can be deployed as a cluster on multiple machines and scale horizontally, but it can also be deployed on a single machine. If you don’t need massive scale, a single machine with ClickHouse can support quite impressive throughput. The clear advantage is that a single machine makes everything—from deploying to maintaining—much easier.
It might seem easier to use a cloud solution like ClickHouse Cloud, but it will cost you. In one of my projects, I moved from a ~$200 bill on ClickHouse Cloud to a ~$40 bill in my self-deployed instance for the same throughput.
In this article, you’ll see a way to deploy ClickHouse that makes the alternatives look criminally hard in comparison. For this, we’ll be deploying a single container to Fly.io. There's some minimal setup, after which you’ll get a fully working ClickHouse instance. You’ll also see some tips and tricks about deployment, security, scaling, and getting some out-of-the-box telemetry.
Here are the steps to deploy. You'll need the following ready:
1. Create a project directory and initialize the Fly.io App
Open your terminal and create a new directory for your project. Then, initialize a new Fly app without immediately deploying it:
mkdir clickhouse-fly
cd clickhouse-fly
flyctl launch --no-deploy
That command will prompt you to modify the initial machine settings. Here are some ballpark numbers for what you’ll need [according to ChatGPT, so take with a grain of salt].
| Use Case | CPU | Memory (RAM) | Notes |
|---|---|---|---|
| Light (dev, small apps) | 4 cores | 8–16 GB | Good for dev, testing, hobby apps. |
| Medium (production apps) | 8–16 cores | 32–64 GB | Good for moderate production, internal dashboards, APIs. |
| Heavy (big prod workloads) | 16–32+ cores | 128–256+ GB | For heavy analytics, OLAP queries, large ingestion. |
I actually recommend going lower rather than higher. Fly.io allows you to easily scale vertically. Just choose something small and monitor the CPU and memory, which is also easy with Fly.io—more on that later.
Once done, a basic fly.toml configuration file will be created in the folder.
2. Create a Dockerfile
Inside your project directory, create a file named Dockerfile (no extension) with the following content:
FROM clickhouse/clickhouse-server:latest
This tells Fly.io to build your app using the official ClickHouse image.
We’ll edit this file later on, but for now, let’s just deploy the image.
3. Create a Volume for Persistent Storage
ClickHouse stores its data by default in /var/lib/clickhouse. To ensure your data persists across deployments, you need to create a Fly volume and mount it. Run the following command (replace <region> with your preferred Fly region code, e.g., ord, ams, etc.):
flyctl volumes create clickhouse_data --region <region> --size 10
This creates a 10 GB volume named clickhouse_data.
4. Configure fly.toml to use the volume and expose ports
Edit fly.toml to the following—just change the app and primary_region fields, and modify the [[vm]] section according to your app. This will expose the necessary ports via Fly.io and attach the volume you created in the previous step.
app = 'clickhouse-fly'
primary_region = 'lhr'


[[vm]]
  memory = '4gb'
  cpu_kind = 'shared'
  cpus = 2

[build]
  dockerfile = "Dockerfile"

[mounts]
  source = "clickhouse_data"
  destination = "/var/lib/clickhouse"

[[services]]
  internal_port = 8123

  [[services.ports]]
    handlers = ["tls"]
    port = 443

  [[services.ports]]
    handlers = ["tls","http"]
    port = 8123

[[services]]
  internal_port = 9000
  protocol = "tcp"

  [[services.ports]]
    port = 9000
5. Deploy the ClickHouse Instance
To deploy with Fly.io, you need to run a single command:
flyctl deploy
You can sit back for a minute and watch with joy as Fly.io deploys ClickHouse.
6. Verify and Connect
Once deployed, check the logs to make sure everything worked correctly:
flyctl logs
You should see ClickHouse startup logs indicating that the server is running.
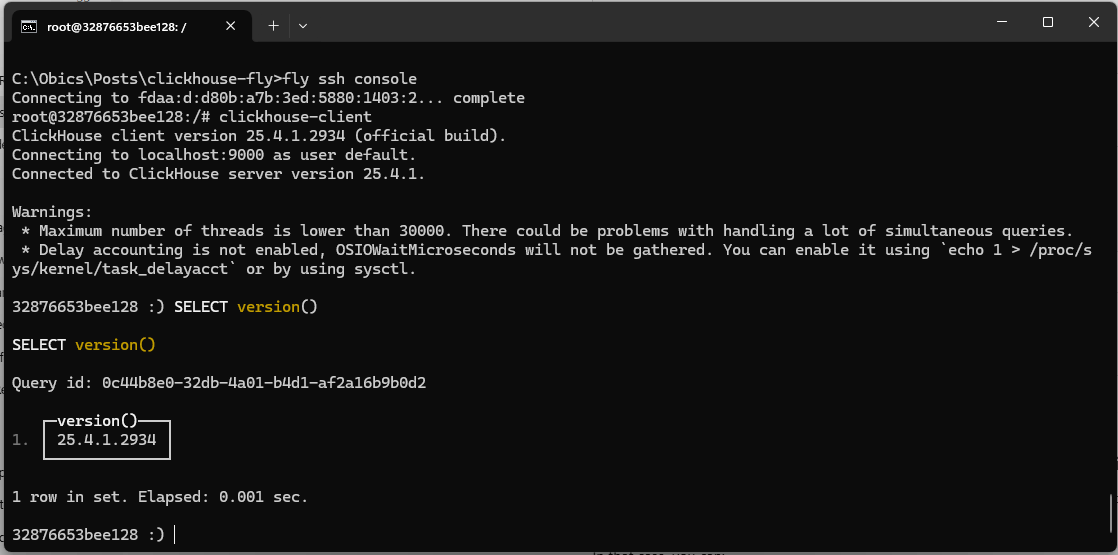
Next, you can SSH into the machine to start interacting with ClickHouse.
fly ssh console
In the terminal that opens, run:
clickhouse-client
Congrats! You�’ve entered the ClickHouse shell, where you can run SQL queries on your newly deployed ClickHouse instance.
7. Set Up HTTPS Connection
Right now, we're using the "default" user with no password. For a secure connection, you’ll need to create a user with a password. The “old” way of doing that was by modifying users.xml, but the new and recommended way is to run an SQL query that creates a user, like so: (run it)
CREATE USER admin IDENTIFIED BY 'my_password';
Now, we need to grant that user some privileges, like the ability to create tables—and this is where it gets slightly complicated. Our only other user is the default user (the one you’re using in the shell), but that user doesn’t have the privileges to grant permissions to other users. So here’s what we’re going to do:
- Add “god” privileges to the
defaultuser by modifyingusers.xml. This isn’t ideal because the password (or lack thereof) is exposed, but we’ll limit access to localhost only and delete those privileges in a moment. - Grant the new “admin” user full god privileges using the
defaultuser. - Remove god privileges from the
defaultuser and remove the localhost-only restriction.
To add god privileges to the default user, add the following line to users.xml:
<grants><query>GRANT ALL ON *.* WITH GRANT OPTION</query></grants>
You could try doing this via SSH, but I recommend creating the file in your project folder and adding it to the Dockerfile so it overrides the existing one. Let’s do that.
Create a users.xml file with the following contents:
<?xml version="1.0"?>
<clickhouse>
    <users>
        <default>
            <password></password>
            <networks>
                <ip>127.0.0.1</ip>     <!-- IPv4 localhost -->
                <ip>::1</ip>           <!-- IPv6 localhost -->
            </networks>
            <profile>default</profile>
            <quota>default</quota>
            <grants>
                <query>GRANT ACCESS MANAGEMENT ON *.*</query>
                <query>GRANT ALL ON *.* WITH GRANT OPTION</query>
            </grants>
        </default>
    </users>
    <profiles>
        <default>
        </default>
    </profiles>
</clickhouse>
This can be made more secure. Even though these are temporary privileges and you're restricting access to localhost, there's still a risk of accidentally leaving password-less access enabled. As an extra precaution, you can replace the empty password with something like: <password_sha256_hex>your-password-sha256-here</password_sha256_hex>
Next, modify the Dockerfile to copy users.xml. It should now contain the following:
FROM clickhouse/clickhouse-server:latest
USER clickhouse
EXPOSE 8123 9000
COPY users.xml /etc/clickhouse-server/users.xml
Redeploy by running
fflyctl deploy
SSH to the machine again
flyctl ssh console
You can check that users.xml changed with cat /etc/clickhouse-server/users.xml
Enter ClickHouse client
clickhouse-client
Remember that admin user that you created before? You should be able to grant privileges for it.
GRANT ALL ON *.* TO admin WITH GRANT OPTION;
That's it. Now you can exit the shell and use curl or Postman to interact with the database. The URL is your Fly.io app name, something like [https://<your-app-name>.fly.dev/](https://clickhouse-fly.fly.dev/). Just use Basic Auth with the username and password you set. The body should be raw text and include the query. For example:
curl -u admin:my_password
	-X POST "https://clickhouse-fly.fly.dev/"
	--data-binary "SELECT version()"
Don’t forget to remove god privileges from the default user! Remove users.xml from Dockerfile and redeploy to Fly.io.
fflyctl deploy
You can double-check that users.xml has the previous stuff by SSHing into the machine and viewing it with cat /etc/clickhouse-server/users.xml.
8. Connect with a nice SQL editor
The tough part's over. You've got your ClickHouse database running with a secure admin user. Now, to actually use it, you probably don't want to mess with curl commands. There are a several good SQL editors that can connect to your new DB:
- Tabix.io - A lightweight, free, web-based SQL editor. Just type in your ClickHouse URL (no
/at the end), your username, and password, and you're good to go. - DBeaver - This desktop SQL editor is more serious with a ton of features. You can add a ClickHouse connection easily—just enter your HTTPS URL (again, no
/at the end) and set the port to 443.
9. Fly.io observability
With a Fly.io app, you get a bunch of cool observability tools right out of the box.
- To see logs (both standard and error output), you can either run
flyctl logsor check them out in the web app dashboard. Just pick your app on the "Apps" page → Live Logs. - You can see your machine's CPU and Memory usage by going to your app → Machines → Metrics icon.

- You can keep an eye on your storage usage in "Volumes" on the same app dashboard page.
Tips
- You can usually find ClickHouse logs at
/var/log/clickhouse-server/clickhouse-server.log. You can SSH into the machine and see them withtail -f /var/log/clickhouse-server/clickhouse-server.log. That being said, a lot of issues happen when ClickHouse starts up, and in those cases, the machine will crash, and you won't be able to SSH in. I couldn't find a way to get these logs from a crashed Fly machine. The workaround is to do the same setup with a local Docker. A local Docker lets you rundocker cp clickhouse-server:/var/log/clickhouse-server/clickhouse-server.log, which will grab the log file and copy it to a local folder, even if the container crashed. So, while I hope you won't need it, it's handy to have the same setup locally if you run into trouble. - If you change any config files using SSH, restarting ClickHouse with
sudo systemctl restart clickhouse-serverwill make the new settings take effect. - ClickHouse can use a lot of memory and will probably be limited by it. You can easily scale Fly.io machines vertically, but the important thing is to watch the memory usage on the machine by going to the metrics screen (the one I mentioned earlier). A bad sign that something's up is when queries start taking way longer than usual or time out.
Summary
We looked at what I think is the easiest way to deploy ClickHouse—in a container on a single machine. We did it with Fly.io, which I think is the most convenient cloud platform out there. I really love Fly.io and wish I could use it for everything. But for various reasons, I have to use the big guys sometimes, and those experiences are usually awful. Deploying a simple app is always way too complicated and makes you deal with complex ops and network stuff that I just don't care about. Anyway, I'll save that rant for another time. I hope you enjoyed this, cheers.